This FAQ'ish guide will attempt to start from scratch on how to "self-host" your own website. This may be either on a computer at home or a server in a datacenter. Hopefully it'll be at least somewhat exhaustive :) It starts with a couple questions you need to answer, then turns more guidey. By the end you should have your very own website accessible to internet.
I assume you have some basic knowledge of Linux and bash (but you won't have to know too much!!) as well as HTML. If you don't know what those are check out this guide for Linux and this guide for HTML. We'll be using nano as the text editor in this guide, but you can of course use anything text editor you'd like!
Every request over the internet ends up at a physical computer somewhere. You'll have to decide exactly where/what that computer will be. You have two options for this:
The VPS will allow you to ignore any and all hardware concerns, but places the onus on an external third party. It's usually a server running within a much larger server, though you can pay for a physical dedicated unit as well. They tend to have much better uptime than a server hosted at home. This also costs a recurring monthly fee! I don't really have an opinion on which provider to use, but AWS EC2 and GCP Compute Engine but am not really attached. They're all just large Tech companies to me! have free tiers. I've used Digital Ocean personally. Be advised that you'll be subject to the laws your website is hosted in.
Hosting with an old computer at home can be cost effective, but also requires you to check on the hardware. An old laptop/desktop or Raspberry Pi can totally manage for a low traffic site. Ideally they'd be hardwired to a router to keep a solid internet connection. I've messed around with hosting over wifi, and was more successful than anticipated. That said, you won't have a stable connection, nor a good upload speed so try for a wired connection!
If you're hosting at home you must have admin access to your router! This will be neccessary to port-forward your web traffic to the computer you're hosting. It's possible to host at home without this access, but is beyond the scope of this guide.
IMO it's easiest to get started with some flavor of Linux. FreeBSD and Windows can also host web servers, but I have no experience with them. I really recommend Debian, it's a solid FOSS choice. If you're using a Raspberry Pi, Raspberry Pi OS is Debian based and also solid. If you're hosting at home you'll probably want to install a Linux OS on your computer. If you're using a VPS, you'll have a choice of OS when you're creating your server instance. This guide assumes a Debian based Linux OS but the general concepts apply across self-hosting in general.
In its most basic sense, a Domain Name is a shorthand way for your computer to find the IP address of another computer to communicate with. You don't strictly need one for this guide to work, but it makes life so much easier. If you're hosting outside the United States, or are hosting at a home address your servers IP address may change constantly. A domain name can point to that changing IP address and ensure that your website is more accessible. There are many different companies that can register domains, but I've used Namecheap in the past. Make sure to find one that has dynamic DNS. Many routers and ISP's come with a dynamic DNS you can use as well. Oh also there's Duck DNS if you're looking for another free option. I'm assuming you have a domain name in this guide.
By now you hopefully have a Debian-based OS running somewhere! If it's a VPS, you need to have a method of accessing it's shell, either via SSH or a web GUI. If it's your own computer, you'll need access to a display, mouse and keyboard.
We'll need to port-forward the ports that designate http and https (the two protocls that serve most webpages). A port is an identification that your webserver has to serve the correct webservice. It's the other part of the address in the TCP + UDP protocols which serve as the tansport layer for a huge part of the intenet. This setup can vary greatly depending on what router you have. A google search should help for specifics, but in general:
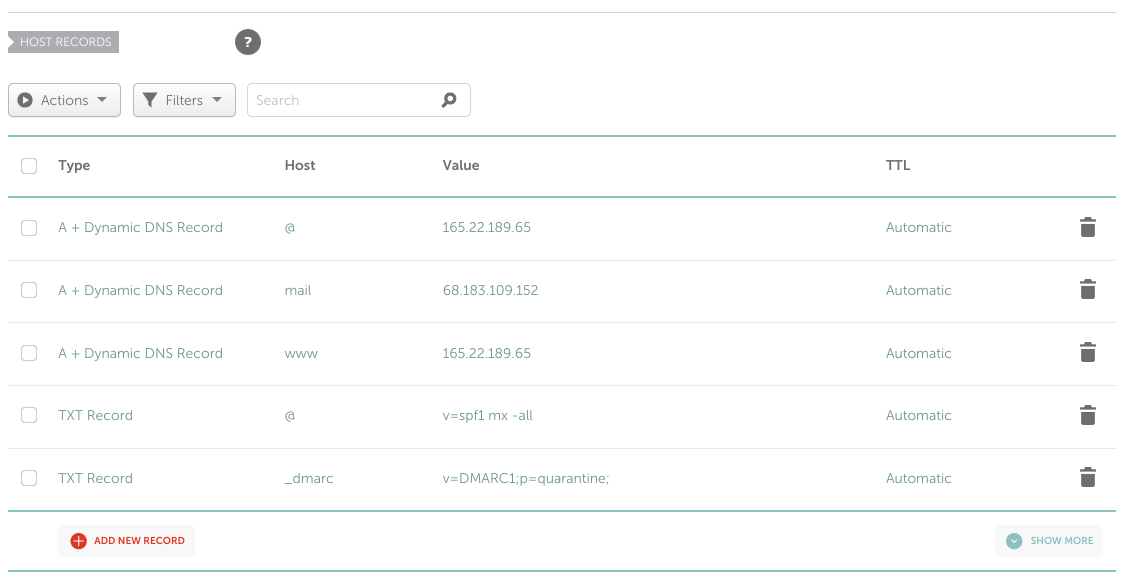
Your server now has an IP address and some form of Linux running. We want to make sure that yourdomainname.com always points to your webserver. If you look at your DNS records for the site you bought, they'll look something like this:
We want to make sure that those A+ Dynamic Records always point to the correct IP address. We'll be using ddclient to set the DNS record the server's IP address even if it changes. This is especially important if you're hosting at home, as most ISP's do not gurantee a static address. To do so we'll want to:
sudo apt install ddclient/etc/ddclient.confThere needs to be an actual program to serve http requests. This is the program that will be the "backend" to the webpages you write. There are quite a few options namely: nginx and Apache. Caddy and lighttpd are also interesting if you want to dig in more! We'll use nginx in this guide.
Install nginx with:
sudo apt install nginx
nginx will start running after it's installed! All of it's config files are stored in /etc/nginx/
We will need to add a couple block to properly utilize our domain name. If you're curious about how to configure
nginx yourself, I highly recommend reading the original config in
/etc/nginx/sites-available/default
nginx is a very configurable piece of software and you can get yourself into trouble if you don't know what's
going on!
With that said, place these configuration files in to /etc/nginx/sites-available/yourdomain after
editing in your domain. You can do this via sudo nano /etc/nginx/sites-available/yourdomain
server {
    listen 80;
    listen [::]:80;

    server_name yourdomainhere!!!;

    root /var/www/yourdomainhere!!!;
    index index.html;

    location / {
            try_files $uri $uri/ =404;
    }
}
If you'd like to redirect www.yourdomain to yourdomain you can add this block in as well:
server {
    listen       80;
    server_name  www.yourdomainhere!!!.com;
    return       301 http://yourdomainhere!!!.com$request_uri;
}
Now we need to enable this webserver, by placing it in nginx's enable list. Run this command with your domainname!
sudo ln -s /etc/nginx/sites-available/yourdomain /etc/nginx/sites-enabled/yourdomain
Also make sure the default site is not enabled via
sudo rm -rf /etc/nginx/sites-enabled/default
And finally reload nginx so it has the up to date settings
sudo nginx -s reload
We're almost there! Now we need to create the directory with our website's files.
sudo mkdir /var/www/yourdomainhere!!!
You can place any files you'd like to server there. The index.html file will be the file you see
by just going to your website. If you're looking for something just to test try this:
sudo echo "Hello World!
" > /var/www/yourdomainhere!!!/index.html
At this point you should have a working website! Navigate to http://yourdomain and you'll see whatever file is in /var/www/yourdomain/index.html!
If you'd like to enable HTTPS (and you should!!) we can use the EFF's certbot to configure nginx and create TLS certs for free! The official instructions here work great but in short summary:
sudo apt install cerbot && sudo apt install python-certbot-nginx